
You’ve chosen the location, decided that a padel court is right for your facility, and are ready to get started with the construction. But do you know what the overall construction process consists of?
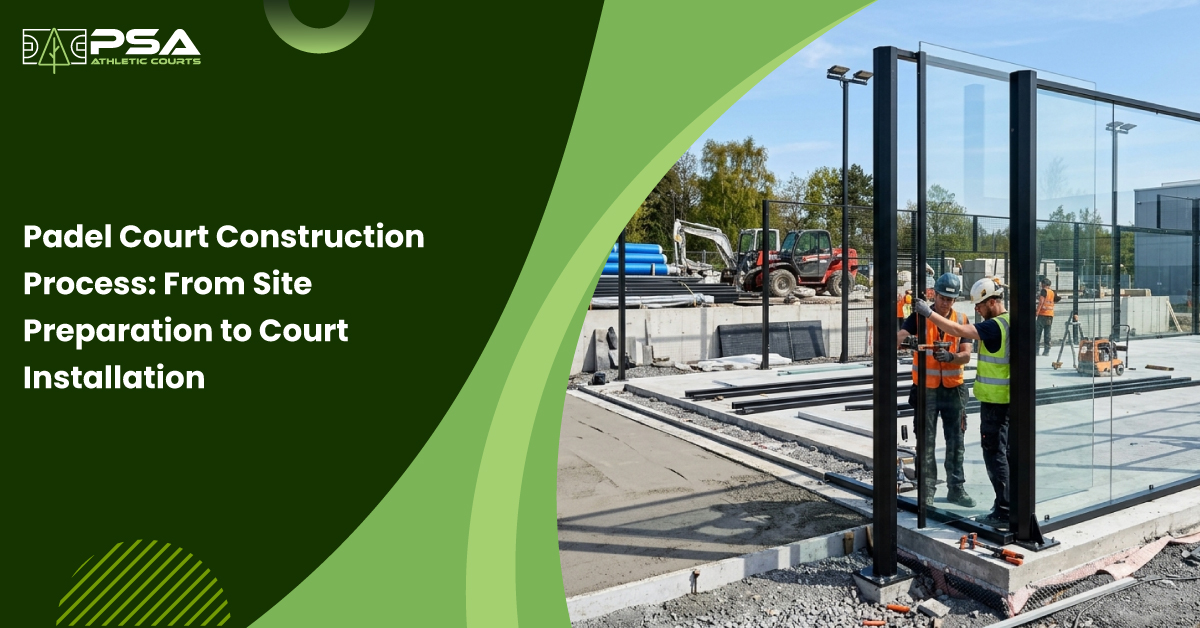
A padel court project moves through several stages before you start playing on it. Your site has to be assessed, the ground prepared, the foundation built, and the court structure, glass, turf, lighting, and other components needs to be installed in the right sequence.
And getting these stages right can have a direct impact on your court’s stability, drainage, playability, and long-term performance. In this Pine State Courts’ guide, we’ll walk you through the entire padel court construction process step by step, from the first site assessment to the final inspection of your court.
Step 1: Assessing the Site before Construction Begins
Before starting with the construction process, it’s important to assess the site you’re planning to build the padel court on. Partnering with an experienced padel court contractor will help with the entire construction process.
In this step, they’ll evaluate your site for dimensions, drainage, foundation requirements, and permitting needs.
Evaluating Available Space
Your padel court designer will start with the dimensions of the court which is 65.6 ft long and 32.8 ft wide. The International Padel Federation (FIP) allows a tolerance of 0.5% to these dimensions. The designer will make sure you have enough space around the court for safe play, placing player benches and spectator seating.
Your site plan should account for the court structure, access points, surrounding circulation, lighting, and any required safety or spectator areas. If you're planning multiple courts, the spacing between courts and access for construction equipment also needs to be considered.
Check our complete guide titled “How big is a Padel Court?” to learn the exact padel court dimensions.
Checking Ground and Soil Conditions
Your padel court builder will then perform a geotechnical soil test to determine the load-bearing capacity of the earth. Identify high water tables or expansive clay soils that require specialized engineered sub-bases. They’ll also remediate any soft or unstable topsoil to ensure it can support the massive weight of the steel and glass structure of the court.
Reviewing Drainage and Water Management
Drainage deserves attention early, particularly for outdoor courts. Water that collects around or beneath the court can contribute to surface problems, erosion, settlement, and long-term deterioration.
Your padel court contractor will determine how existing water moves across the site and whether additional drainage measures are needed.
Step 2: Planning the Padel Court Layout and Project
Once the site is considered suitable for padel court construction, the project moves into detailed planning. This is where the court's position, orientation, specifications, materials, and construction sequence are finalized.
Selecting the Court Location and Orientation
For outdoor padel courts, orientation can affect how sunlight interacts with the play. That’s why a North-South orientation is recommended to prevent Sun glare during Sunrise and Sunset.
Your contractor will also consider the surrounding environment including trees, buildings, nearby structures, prevailing weather, access routes, and potential future expansion during site planning. You should also check the local zoning laws, property setbacks, and noise ordinances regarding sports facilities.
Finalizing the Padel Court Design
You can pick between traditional, framed padel court design or a panoramic structural layout which uses minimal steel posts for better spectator visibility. For the glass walls, it is recommended to use 10mm or 12mm tempered/toughened glass panels mounted on shock-absorbing neoprene joints to minimize breakage and vibration.
It is also at this stage that you will decide on the mesh system, doors, artificial turf, lighting, color scheme, and optional features such as canopies for your padel court.
Preparing the Construction Schedule
Finally, the contractor will discuss the construction schedule with you. Beyond the actual padel court installation, your contractor will also account for other processes including site preparation, concrete work, curing, material delivery, electrical work, weather, and final inspections.
It is also important to clarify which of these works is included in your contractor's scope to avoid any delays later.
Step 3: Preparing the Site for Construction
Once the design and site plan for your padel court construction are approved, the next step is to physically prepare your site. This includes:
Clearing and Excavating the Area
Your contractor will remove unsuitable material, vegetation, debris, or existing surfaces as required by the project. Your builder will excavate down to 20 to 40 cm depending on the base design.
If you’re considering an existing concrete or asphalt area, your padel court builder will assess its condition, level, drainage, thickness, and ability to support the court system before starting construction.
Grading and Leveling
The prepared area must be brought to the required levels before the foundation can be installed. Accuracy at this stage matters the most as poor grading can create drainage problems or leave the finished court with unwanted level differences.
The objective here is not simply to make your site look flat but the finished base needs to provide the correct conditions for the foundation and court structure.
Installing or Improving Drainage
Besides grading the surrounding area, drainage work includes improving runoff routes and installing additional drainage infrastructure where necessary to ensure water drains away from the court. For outdoor courts, this work is completed before the final base is installed as fixing drainage problems after the court is assembled can be far more disruptive.
Step 4: Building the Foundation and Base
The next step after site preparation is to build the court’s foundation. Your padel court builder will ensure you have a stable platform that supports the court structure.
Preparing the Base
The sub-base of your court is prepared by adding a thick layer of crushed stone, gravel, or hardcore material. It will act as the main load-bearing foundation of your court. The soil and stone layers are then compacted tightly to stop the ground from shifting or settling later.
Installing the Concrete Foundation
A continuous mesh of steel rebar reinforcement is laid down to prevent the slab from cracking under pressure. A concrete or asphalt slab is then added to it. As the court's structural frame will ultimately be anchored to this foundation, any errors at this stage can affect your court installation later.
Allowing the Foundation to Cure
Your contractor will follow the concrete specification and manufacturer's requirements for curing before anchoring the court structure. This stage forms a major part of your overall construction schedule, taking anywhere from 14 to 30 days for asphalt and around 45 days for concrete. The weather conditions also affect this timeline.
Step 5: Installing the Padel Court Structure
Once the foundation is ready, your padel court contractor will start adding structural parts of your padel court. This includes:
Installing the Steel or Structural Frame
The structural frame is anchored to the prepared foundation and assembled according to the court manufacturer's specifications. Precision is particularly important here because the frame must establish the correct geometry for the glass, mesh, doors, and playing area.
Installing Glass Panels and Mesh
Tempered glass panels and metal mesh form the enclosed playing environment of your padel court. These components must be securely fitted and aligned with the structural frame. The quality of the glass, fasteners, protective components, and installation method all contribute to the player safety and long-term durability of your court.
Installing Doors and Court Access Points
Doors are installed once the main enclosure of your court is established. They are positioned to provide convenient access to players without creating unnecessary hazards around the playing area.
The final installation should also leave access points and surrounding areas clear of construction materials and other obstacles.
Step 6: Installing the Playing Surface
The playing surface is installed next after the underlying construction has been properly prepared. This includes:
Preparing the Court Surface
Before laying the turf, the court base is cleaned to remove all dust, pebbles, and construction debris. Any remaining unevenness or defects should be addressed before the surface installation, also ensure that the concrete/ asphalt surface is entirely dry, as residual moisture will ruin the turf adhesive bond.
You can also check our indoor padel court surfacing guide, if you’re evaluating different surface options for your court.
Installing Artificial Turf
Artificial turf is then fitted across the playing area and secured according to the selected system. Your court builder will ensure that the installation is precise so the turf remains stable and the finished playing area provides consistent ball response and player traction.
Marking the Playing Lines
The court lines are then positioned according to the official dimensions and playing layout laid down by FIP. Accuracy matters at this stage as line placement will contribute directly to the way players use the court, so measurements should be checked before the court is considered complete.
Step 7: Adding Court Lighting and Other Features
Four tall poles (two on each side) are placed completely outside the court boundaries and safety zones to prevent player collisions. The lower part of the light fixtures are mounted at a minimum height of 6 meters (20 feet) to 8 meters above the ground to avoid direct glare or shadows.
LED floodlights are installed (200W to 400W per fixture) to achieve at least 200 lux for recreational play or 500 lux for competitive tournaments. Galvanized and powder-coated metal net posts are securely fixed into anchor sleeves centered precisely on the side lines of the court. The net is set at a height of 3 ft at the posts and 2.9 ft in the center.
Other features, such as canopies, benches, signage, ball storage, or additional access features, can also be installed at this stage depending on your project requirements.
Step 8: Final Inspection and Court Testing
When it comes to the final inspection, it isn’t just a visual walkthrough. Your contractor will check the completed structure, glass and mesh, doors, playing surface, markings, drainage, lighting, and other installed components.
For facility owners, this is also the right time to confirm that:
- The court is level and properly aligned.
- Glass panels and structural components are secure.
- Doors operate correctly.
- The turf is properly installed.
- Court markings are accurate.
- Lighting provides appropriate coverage.
- Drainage around the court is functioning as intended.
- The surrounding playing and access areas are free from construction hazards.
Once these checks are complete, the contractor can provide any required maintenance guidance and hand the court over for use.
At Pine State Courts, we include final inspection and quality assurance as a part of our padel court installation services. We also offer repair, maintenance, and padel court resurfacing services to maintain and enhance the durability of your court.
How Long Does Padel Court Construction Take?
Constructing a padel court generally takes 6 to 10 weeks from start to finish, though the actual physical assembly of the court structure takes only 3 to 5 days once the foundation is ready. Here’s the detailed breakdown of the construction timeline:
- Planning and Permits: This step usually takes 2 to 8 weeks depending on the local zoning, planning permission, and engineering requirements.
- Site Prep and Foundation: This step takes 2 to 4 weeks and includes grading, excavating, pouring concrete, and allowing the slab to fully cure.
- Court Assembly: This step takes 3 to 5 days to install the steel structure, glass walls, turf, and net system.
- Lighting and Finishing: This step takes 2 to 3 days to wire the floodlights, add accessories, and conduct final safety checks.
This timeline varies if you’re working on an existing hardtop slab, skipping major excavation, or if there are any unfavourable weather conditions that can affect the curing times.
What to Prepare before Your Padel Court Contractor Arrives
A smooth installation starts long before the construction day. Facility owners and homeowners can help their padel court contractor by keeping their site details, finalizing court design, and approvals ready.
Here’s a list of the information that you should prepare before the contractor arrives:
- Confirm the project scope - Make sure you understand what is included in the contractor's price, particularly site work, foundation construction, electrical work, drainage, lighting, and cleanup.
- Confirm permits and approvals - Confirm which approvals including planning, zoning, building, electrical, or other approvals are required for your location and project.
- Provide site information - Existing surveys, utility information, property plans, previous construction details, and drainage information can help the contractor assess the site.
- Finalize design decisions early - Court configuration, turf, colors, lighting, access, and optional features should be decided before materials are ordered whenever possible.
- Plan access for construction - Large materials and equipment need a practical route to the installation area. Make sure the logistics between delivery points and the prepared foundation are prepared.
The more of these details you resolve before the construction begins, the fewer surprises are likely to occur once the work starts.
Final Thoughts
A successful project for padel court installation is designed and built in stages. And the performance of your padel court depends heavily on this work from accurate site assessment, proper grading and drainage, building a suitable foundation and precise structural installation to careful surface and lighting work.
That’s why choosing a contractor with experience in athletic court construction matters. At Pine State Courts, we plan for everything from your site conditions, installation requirements and player safety to the long-term performance of your finished facility. Contact our padel court builders to discuss your project.
Frequently Asked Questions
1. How much space do you need to build a padel court?
To build a padel court you need a minimum area of 75.5 feet x 42.6 feet (or 23m x 13m) which includes the playing field of 65.6 feet x 32.8 feet and additional space out of the court for layer movement and safety. You also need a minimum vertical clearance of 19.7 feet, 26.3 feet is generally recommended to prevent lobs from hitting the roof.
2. How long does it take to build a padel court?
The project timeline of your padel court construction is generally 6 to 10 weeks from start to finish. It can vary depending on your particular site requirements, curing time of your court base, and the weather conditions.
3. What type of foundation does a padel court need?
Your padel court needs a highly stable, perfectly level, and structurally reinforced foundation to withstand the weight of its heavy glass walls, steel frame, dynamic player impacts, and wind loads.
4. Can a padel court be installed on an existing concrete or asphalt surface?
Yes, you can install your padel court over an existing concrete or asphalt surface if it meets the strict structural, thickness, and leveling requirements. Your padel court contractor will help you confirm this.
5. Do outdoor padel courts need drainage?
Yes, outdoor padel courts need proper drainage to prevent standing water, surface damage, and extended downtime after rain. You can use porous sub base and surface drainage channels around the edges besides proper grading to ensure efficient drainage.
DOWNLOAD OUR FREE GUIDE
Ready to build your dream court?
Download our FREE Basketball Court Construction & Planning Checklist and get the step-by-step roadmap to building a professional-grade court—from budget planning to final touches.
No guesswork, just results.